Installing a Stinger Transition is Easy
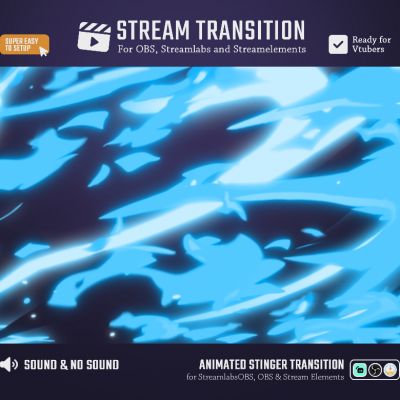
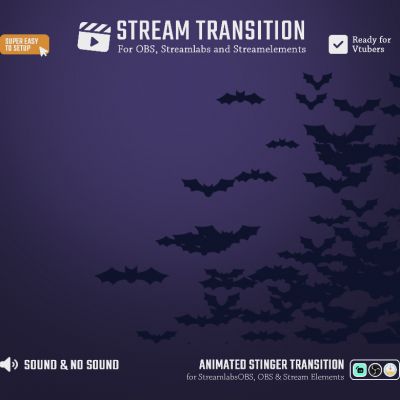
n the ever-evolving world of live streaming, standing out from the crowd requires a touch of professionalism and unique branding. One such way to elevate your streams is through the use of stinger transitions – short, dynamic animations that bridge the gap between scenes, ensuring a smooth and visually appealing shift for your viewers. If you are looking for a stinger transition, take a look at our collection of stream transitions.


Installing Stinger Transitions in OBS
- Launch OBS Studio:
Begin by opening the OBS Studio application on your computer. 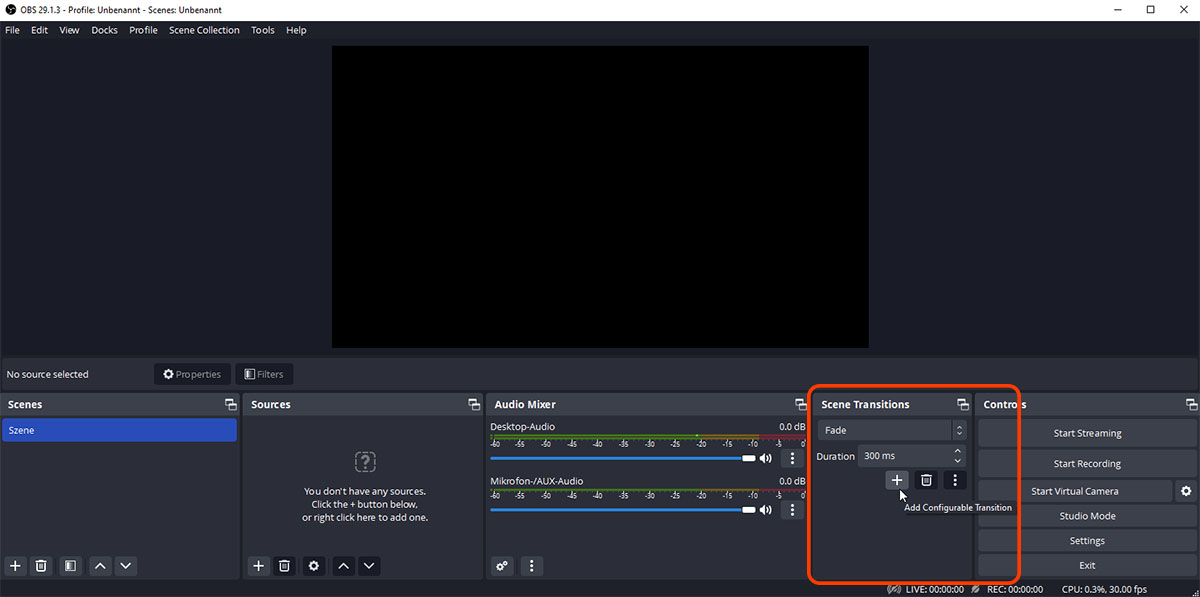
Add a New Transition:
In the panel located on the bottom right, titled ‘Scene Transitions,’ click on the ‘+’, or ‘Add’ button. A list of transition types will appear.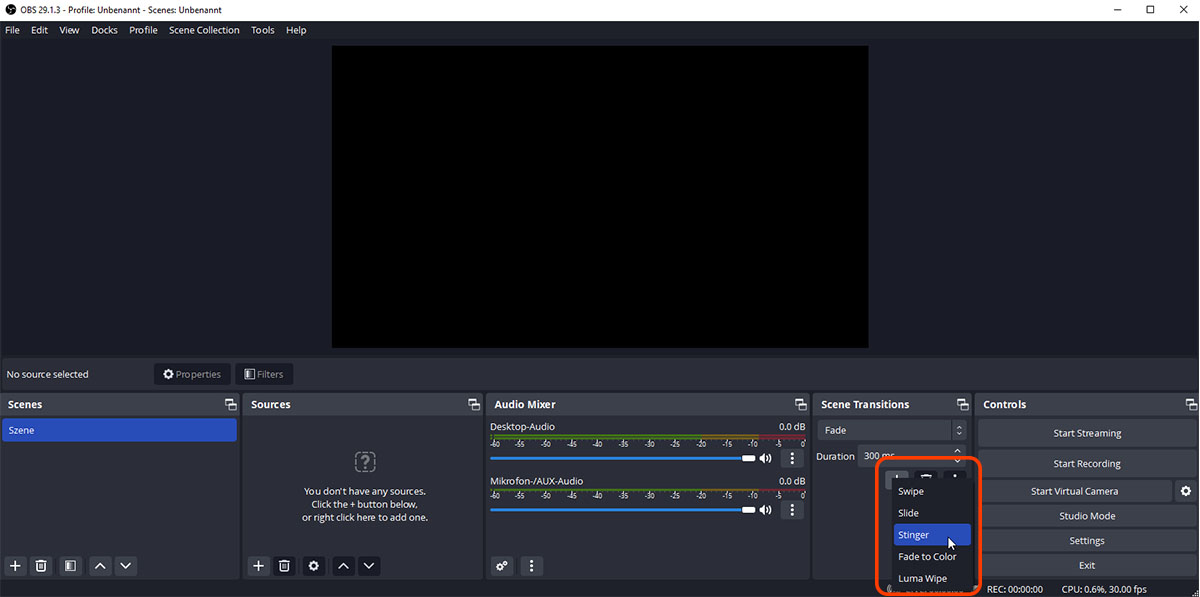
Chose the transition type:
Choose ‘Stinger’ from the list and give your stinger transition a name.
Configure Your Stinger:
A window titled ‘Properties for Stinger’ will appear.
Under ‘Video File,’ click on ‘Browse’ to locate and select your stinger transition video file. Typically, these files are in .webm or .mov format.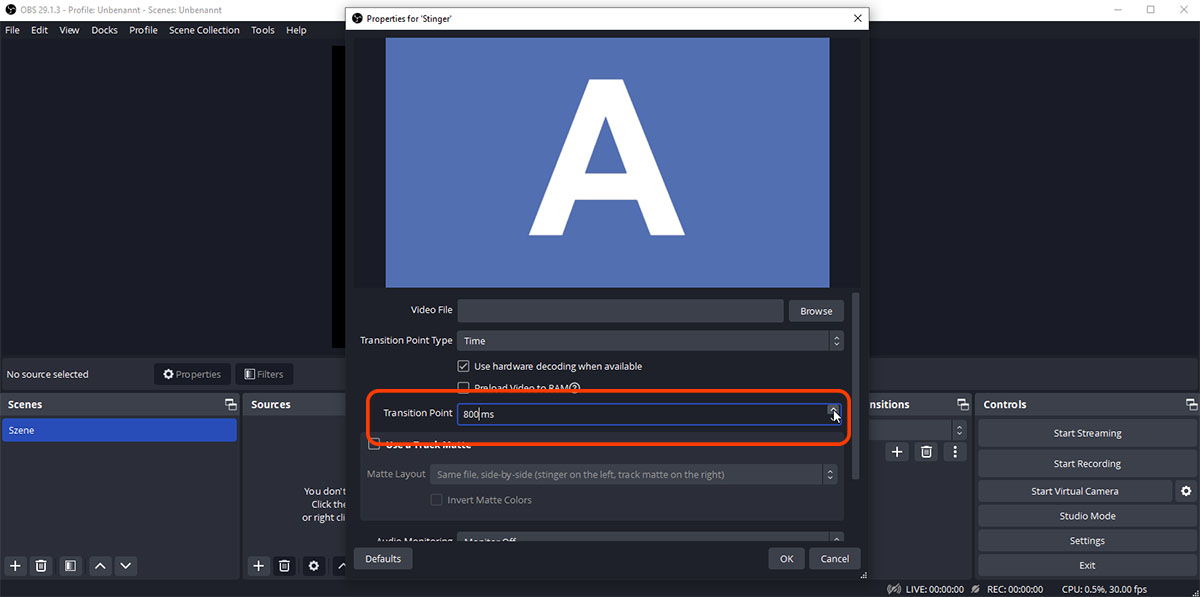
Choose your Transition Timing:
Determine the ‘Transition Point Type’ – usually set to ‘Time (ms)’ or ‘Frame.’ Set the transition point. This is the exact moment when the scene transition happens (in milliseconds or frames, depending on what you chose in the previous step).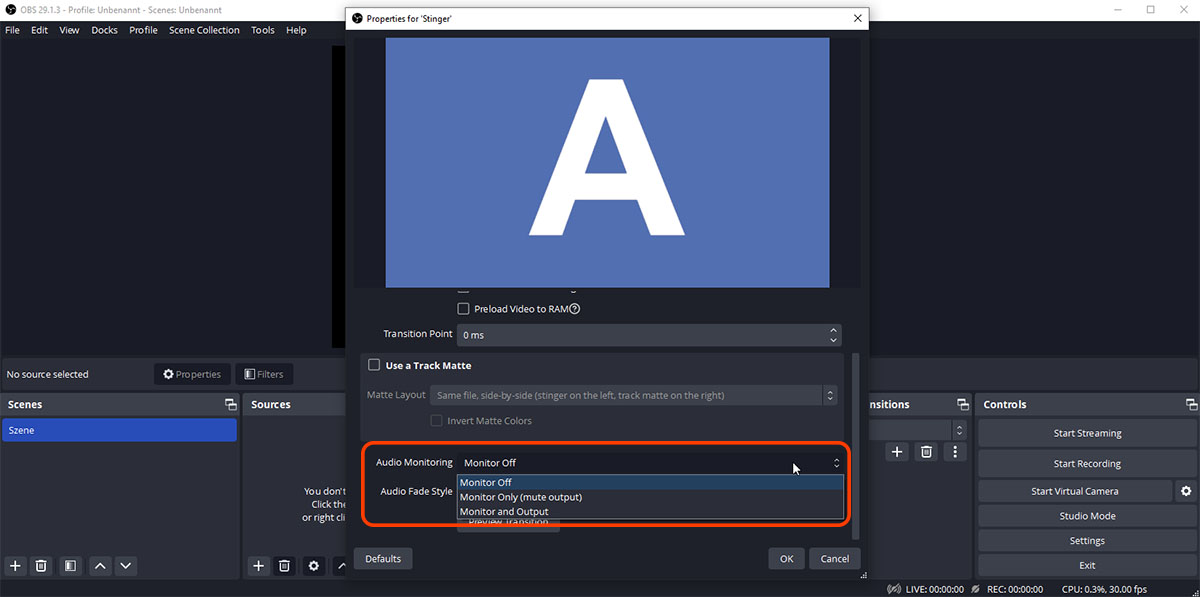
Audio Monitoring:
Decide if you want to hear the transition’s sound during the broadcast. You can set this to ‘Monitor Off’, ‘Monitor Only’, or ‘Monitor and Output’.
Audio Fade Style: Choose how the audio should fade during the transition. Options include ‘Crossfade’ and ‘Fade Out and Fade In’.- Test the Transition:
Switch between different scenes to see how your new Stinger transition looks and feels. Make adjustments in the properties window if needed. - Save & Use:
Once satisfied, click ‘OK’ in the properties window. Now, every time you switch scenes, the Stinger transition you set up will play.
Installing Stinger Transitions in Streamlabs OBS
- Create or Obtain a Stinger Transition:
First, you’ll need to either create or obtain a stinger transition. You can purchase pre-made stingers, commission custom ones, or even create your own with animation software. - Open Streamlabs OBS:
Launch Streamlabs OBS and ensure you are logged into your account. 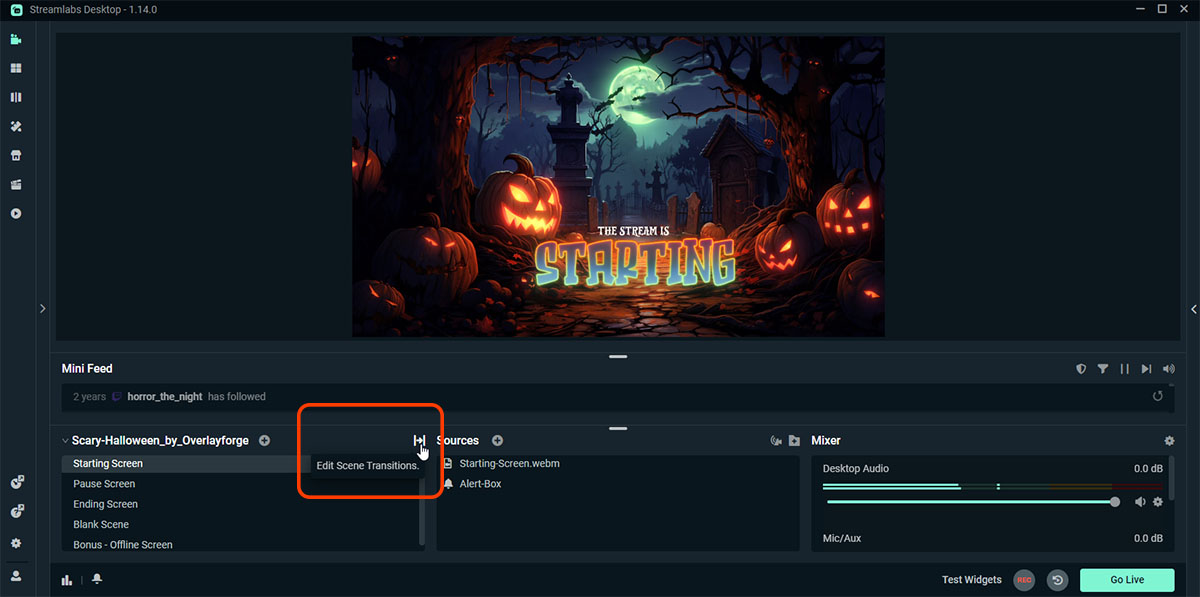
Navigate to the Scene Transitions Section:
At the bottom left of Streamlabs OBS, you’ll see a section named “Edit Scene Transitions.” If you can’t see it, try resizing your window or adjusting the UI settings.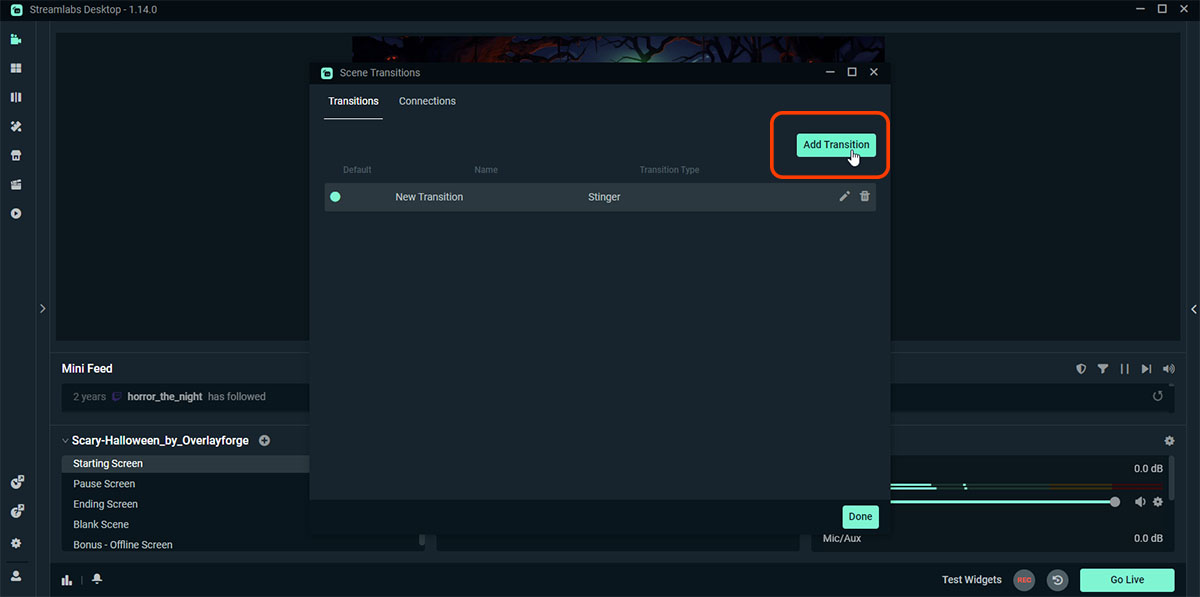
Add a New Transition:
Click on the drop-down arrow next to the current transition name.
– Click on the “+” button to add a new transition.
– From the list that appears, choose “Stinger”.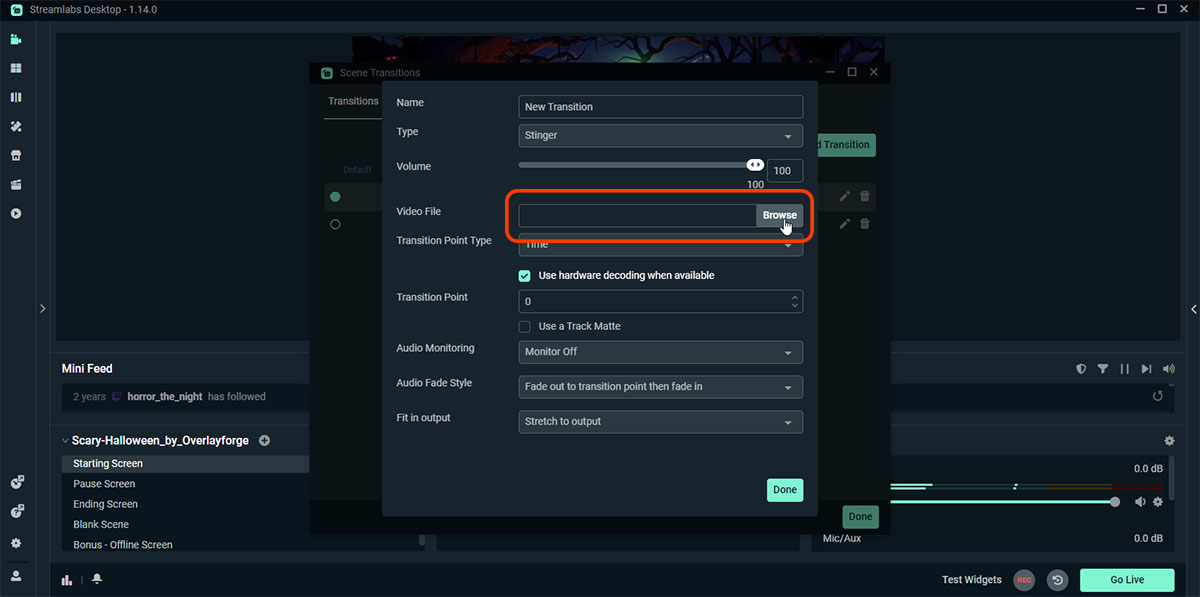
Name and Configure Your Transition:
– Give your transition a name.
– Click on “Browse” to locate and select the stinger video file you wish to use.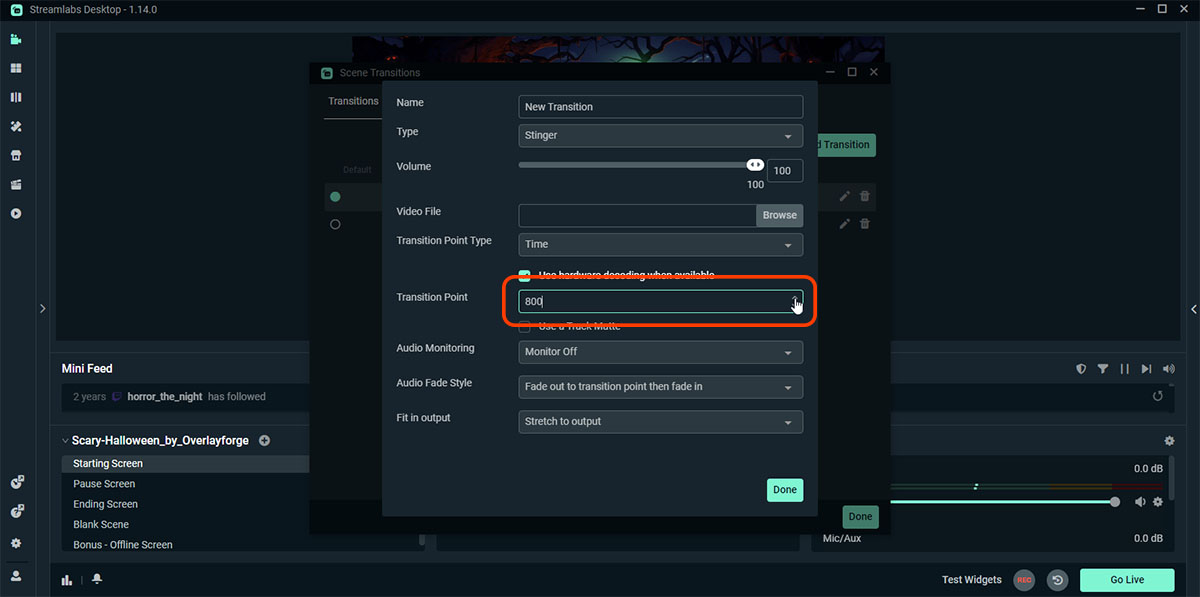
Adjust Transition Point (if necessary):
Stinger transitions often require a specific “transition point” – the exact moment when the scene changes behind the animation.Adjust the “Transition Point (ms)” slider or input a value. This denotes the time (in milliseconds) from the start of the stinger video when the actual scene change should happen.
Note: This may require some trial and error to get right, depending on the specific stinger animation you’re using.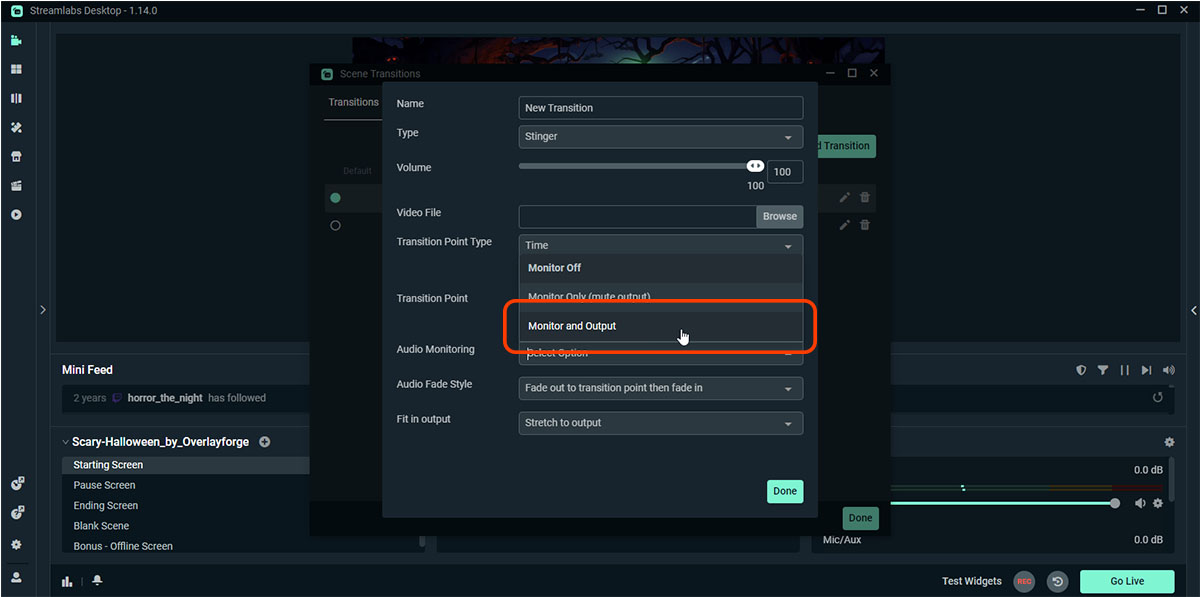
Audio Monitoring:
If your stinger has audio, you can decide if you want to hear it during the transition.
– Choose “Monitor Off” if you don’t want to hear it.
– Choose “Monitor Only” if you want to hear it but not send it to the stream.
– Choose “Monitor and Output” if you want both you and the stream to hear it.- Click on “Done”:
Once you’ve set everything up, click on the “Done” button to save and close the settings. - Set as Default (optional):
If you want this stinger transition to be used for all scene changes, click on the dropdown arrow next to the current transition name again and click the gear icon (settings). Set the desired stinger as the default transition. - Test Your Transition:
Switch between different scenes in Streamlabs OBS to ensure that your stinger transition works smoothly.